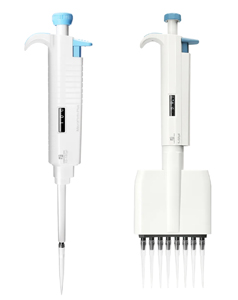
Model Name: Mechniacl Pipette
Model No.: MicroPette Plus
Fully Autoclavable Mechanical Pipette
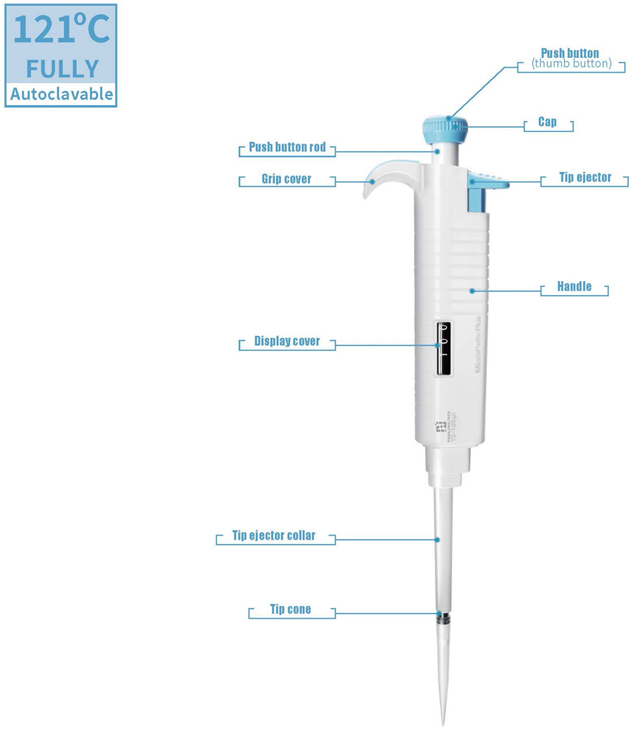
The MicroPette Plus pipette is fully autoclavable, being able to withstand temperatures of 121℃ and pressure of 1 ATM, and does not need to be pre-treated prior. Following the autoclave cycle, a 12 hour cooling and drying period ensures that the high performance of the MicroPette Plus is retained. It is recommended the piston and rubber seals be greased after every 10 cycles of autoclaving.
Features
• Available as Fixed Volume and Adjustable Volume formats
• Streamlined shape design
• Comprehensive volume range from 0.1μL to 5000μL
• Easy calibration and maintenance
• 8 channels pipette option
• Dispensing head rotates for effortless pipetting convenience
• Individual piston and tip cone assembly
• Spring loaded tip cones for easy cleaning and maintenance
• Compound material-made tip cone secures high sealing performance
Product Show


Specifications
This Volume List Is for MicroPette Plus (Adjustable and Fixed Volume)
Single-channel Adjustable Volume Pipettes | ||||||
Volume Range | Increment | Test Volume | Error Limits In Accordance with ISO08655-2 | |||
Systematic Error | Random Error | |||||
μL | μL | μL | μL | % | μL | % |
0.1 to 2.5 | 0.05 | 2.5 | ±0.0625 | ±2.50 | ±0.05 | ±2.00 |
1.25 | ±0.0375 | ±3.00 | ±0.0375 | ±3.00 | ||
0.25 | ±0.03 | ±12.00 | ±0.015 | ±6.00 | ||
0.5 to 10 | 0.1 | 10 | ±0.10 | ±1.00 | ±0.08 | ±0.80 |
5 | ±0.075 | ±1.50 | ±0.075 | ±1.50 | ||
1 | ±0.025 | ±2.50 | ±0.015 | ±1.50 | ||
2 to 20 | 0.5 | 20 | ±0.18 | ±0.90 | ±0.08 | ±0.04 |
10 | ±0.12 | ±1.20 | ±0.10 | ±1.00 | ||
2 | ±0.06 | ±3.00 | ±0.004 | ±2.00 | ||
5 to 50 | 0.5 | 50 | ±0.30 | ±0.60 | ±0.15 | ±0.30 |
25 | ±0.225 | ±0.90 | ±0.15 | ±0.60 | ||
5 | ±0.10 | ±2.00 | ±0.10 | ±2.00 | ||
10 to 100 | 1.0 | 100 | ±0.80 | ±0.80 | ±0.15 | ±0.15 |
50 | ±0.50 | ±1.00 | ±0.20 | ±0.40 | ||
10 | ±0.30 | ±3.00 | ±0.15 | ±1.50 | ||
20 to 200 | 1.0 | 200 | ±1.20 | ±0.60 | ±0.30 | ±0.15 |
100 | ±0.80 | ±0.80 | ±0.30 | ±0.30 | ||
20 | ±0.60 | ±3.00 | ±0.20 | ±1.00 | ||
50 to 200 | 1.0 | 200 | ±1.20 | ±0.60 | ±0.30 | ±0.15 |
100 | ±0.80 | ±0.80 | ±0.30 | ±0.30 | ||
50 | ±0.50 | ±1.00 | ±0.20 | ±0.40 | ||
100 to 1000 | 5.0 | 1000 | ±6.00 | ±0.60 | ±2.00 | ±0.20 |
500 | ±3.50 | ±0.70 | ±1.25 | ±0.25 | ||
100 | ±2.00 | ±2.00 | ±0.70 | ±0.70 | ||
200 to 1000 | 5.0 | 1000 | ±6.00 | ±0.60 | ±2.00 | ±0.20 |
500 | ±3.50 | ±0.70 | ±1.25 | ±0.25 | ||
200 | ±1.80 | ±0.90 | ±0.60 | ±0.30 | ||
1000 to 5000 | 50.0 | 5000 | ±25.00 | ±0.50 | ±7.50 | ±0.15 |
2500 | ±15.00 | ±0.60 | ±7.50 | ±0.30 | ||
1000 | ±7.00 | ±0.70 | ±3.00 | ±0.30 | ||
User calibration should refer to the industrial standard ISO8655-2.
Fixed Volume Pipettes | ||||||
Volume Range | Increment | Test Volume | Systematic Error | Random Error | ||
μL | - | μL | μL | % | μL | % |
5 | - | 5 | ±0.0625 | ±1.3 | ±0.06 | ±1.2 |
10 | - | 10 | ±0.08 | ±0.8 | ±0.08 | ±0.8 |
20 | - | 20 | ±0.12 | ±0.6 | ±0.10 | ±0.5 |
25 | - | 25 | ±0.125 | ±0.5 | ±0.075 | ±0.3 |
50 | - | 50 | ±0.25 | ±0.5 | ±0.15 | ±0.3 |
100 | - | 100 | ±0.50 | ±0.5 | ±0.30 | ±0.3 |
200 | - | 200 | ±0.80 | ±0.4 | ±0.40 | ±0.2 |
250 | - | 250 | ±1.00 | ±0.4 | ±0.50 | ±0.2 |
500 | - | 500 | ±1.5 | ±0.3 | ±1.0 | ±0.2 |
1000 | - | 1000 | ±3.0 | ±0.3 | ±2.0 | ±0.2 |
2000 | - | 2000 | ±6.0 | ±0.3 | ±3.0 | ±0.15 |
5000 | - | 5000 | ±15.0 | ±0.3 | ±7.5 | ±0.15 |
8-channel Adjustable Volume Pipettes | ||||||
Volume Range | Increment | Test Volume | Systematic Error | Random Error | ||
μL | μL | μL | μL | % | μL | % |
0.5 to 10 | 0.1 | 10 | ±0.15 | ±1.50 | ±0.15 | ±1.50 |
5 | ±0.125 | ±2.50 | ±0.125 | ±2.50 | ||
1 | ±0.04 | ±4.00 | ±0.04 | ±4.00 | ||
5 to 50 | 0.5 | 50 | ±0.5 | ±1.00 | ±0.25 | ±0.50 |
25 | ±0.375 | ±1.50 | ±0.25 | ±1.00 | ||
5 | ±0.15 | ±3.00 | ±0.10 | ±2.00 | ||
10 to 100 | 1.0 | 100 | ±0.8 | ±0.8 | ±0.3 | ±0.30 |
50 | ±0.5 | ±1.00 | ±0.4 | ±0.80 | ||
10 | ±0.3 | ±3.00 | ±0.2 | ±2.00 | ||
50 to 300 | 5 | 300 | ±2.1 | ±0.70 | ±0.75 | ±0.25 |
150 | ±1.5 | ±1.00 | ±0.75 | ±0.50 | ||
50 | ±0.75 | ±4.50 | ±0.40 | ±0.80 | ||
100 to 1000 | 10 | 1000 | ±10.0 | ±1.00 | ±3.00 | ±0.30 |
500 | ±10.0 | ±2.00 | ±2.50 | ±0.50 | ||
100 | ±5.0 | ±5.00 | ±1.00 | ±1.00 | ||
Fangjing specifications are used as guidelines and the user calibration should refer to the industrial standard ISO 8655.